
With Power Apps you can take the data entered into a form and use it to create PDF. This feature is not available out-of-the-box but I can show you how to build it. To do this we will build a basic form in Power Apps. Then we will design a Word document template and use Power Automate to fill and convert it to PDF. From there you either store the PDF in a SharePoint document library or sent in as an email attachment. In this article I will reveal the simplest way to generate a PDF form in Power Apps.
Table Of Contents: • Word Document Template Method vs HTML Document Method • Introduction: The Restaurant Inspection App • Setup The SharePoint List • Create A Restaurant Inspection Form • Configure The Inspection Form Questions • Submit The Restaurant Inspection Form • Enable The Developer Tab In Microsoft Word • Add Plain Text Fields To The Word Document Template • Save The Word Document Template To OneDrive • Fill-in The Word Document Template With Power Automate • Generate The PDF Document Using Power Apps & Power AutomateThere are are two popular methods to generate a pdf document in Power Apps. The first is to create a fillable Word document template, populate the fields using Power Automate and convert to PDF. The second is to write code for an HTML template directly in Power Apps and use Power Automate to convert HTML to PDF. Here’s why I believe the Word Document template method is best:
Word Document Template Benefits:
Word Document Template Drawbacks:
Staff at a restaurant chain use the Restaurant Inspection App to record the results of a food safety inspection.
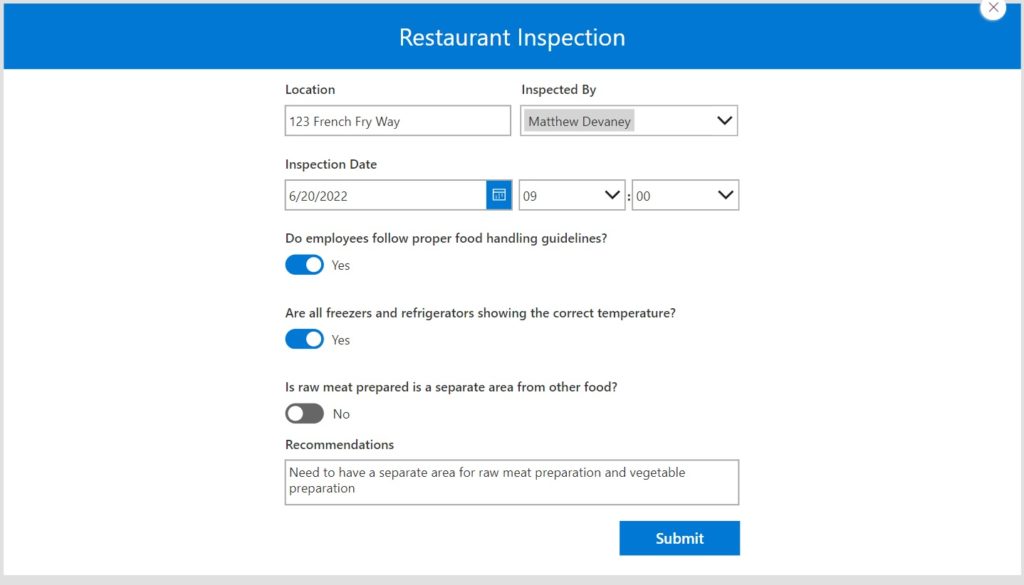
When the form above is submitted A PDF showing the inspection results is created and gets sent to the restaurant manager.

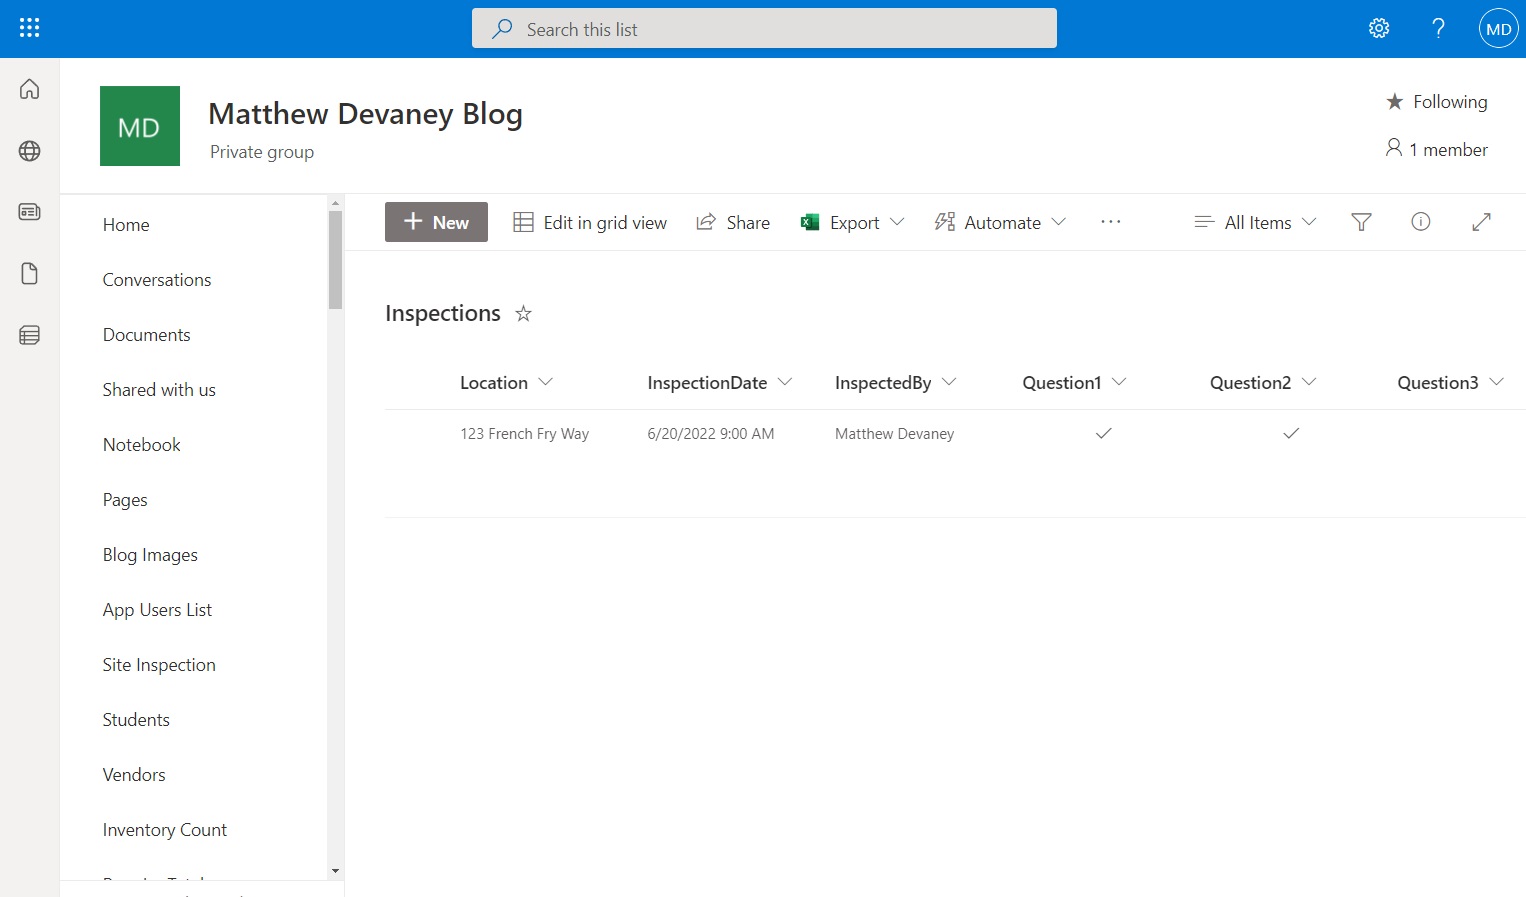
Setup The SharePoint List
Create a SharePoint List called Inspections with the following
Create A Restaurant Inspection Form
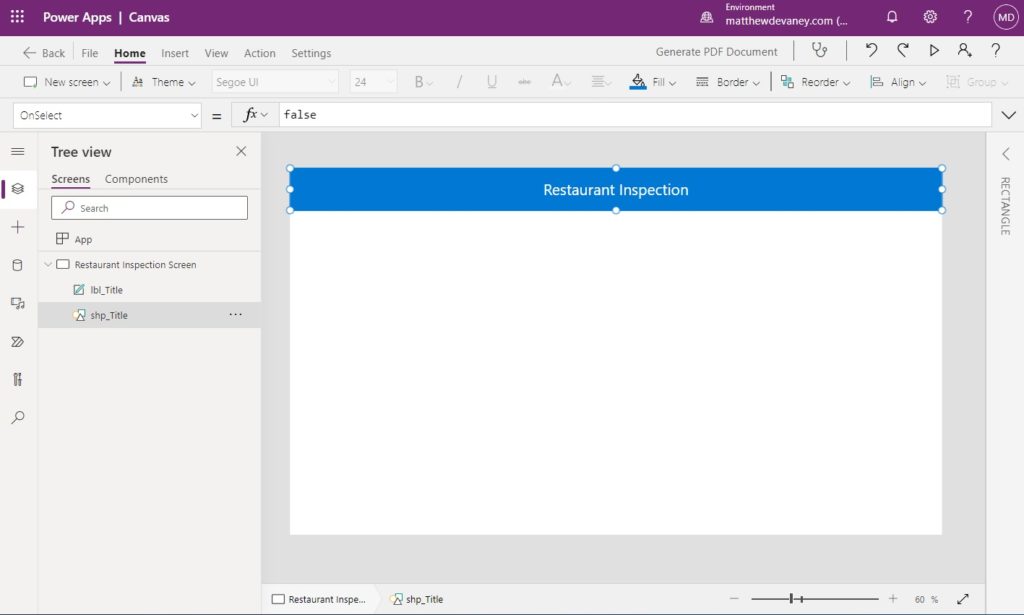
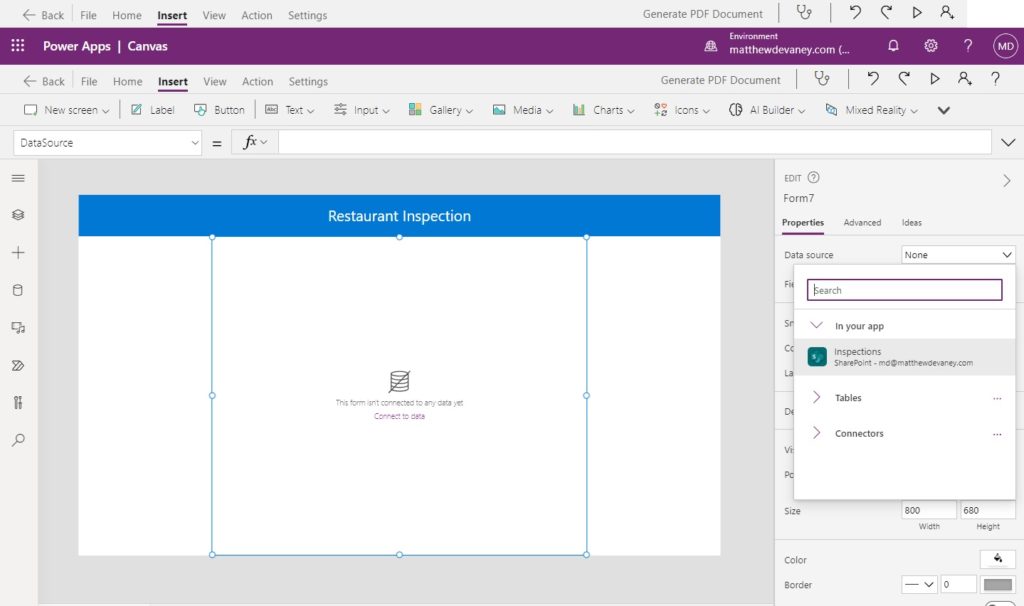
Open Power Apps Studio and create a new canvas app from blank. Insert a label at the top of the app with the words “Restaurant Inspection” and place a rectangle shape behind it with a blue fill property.
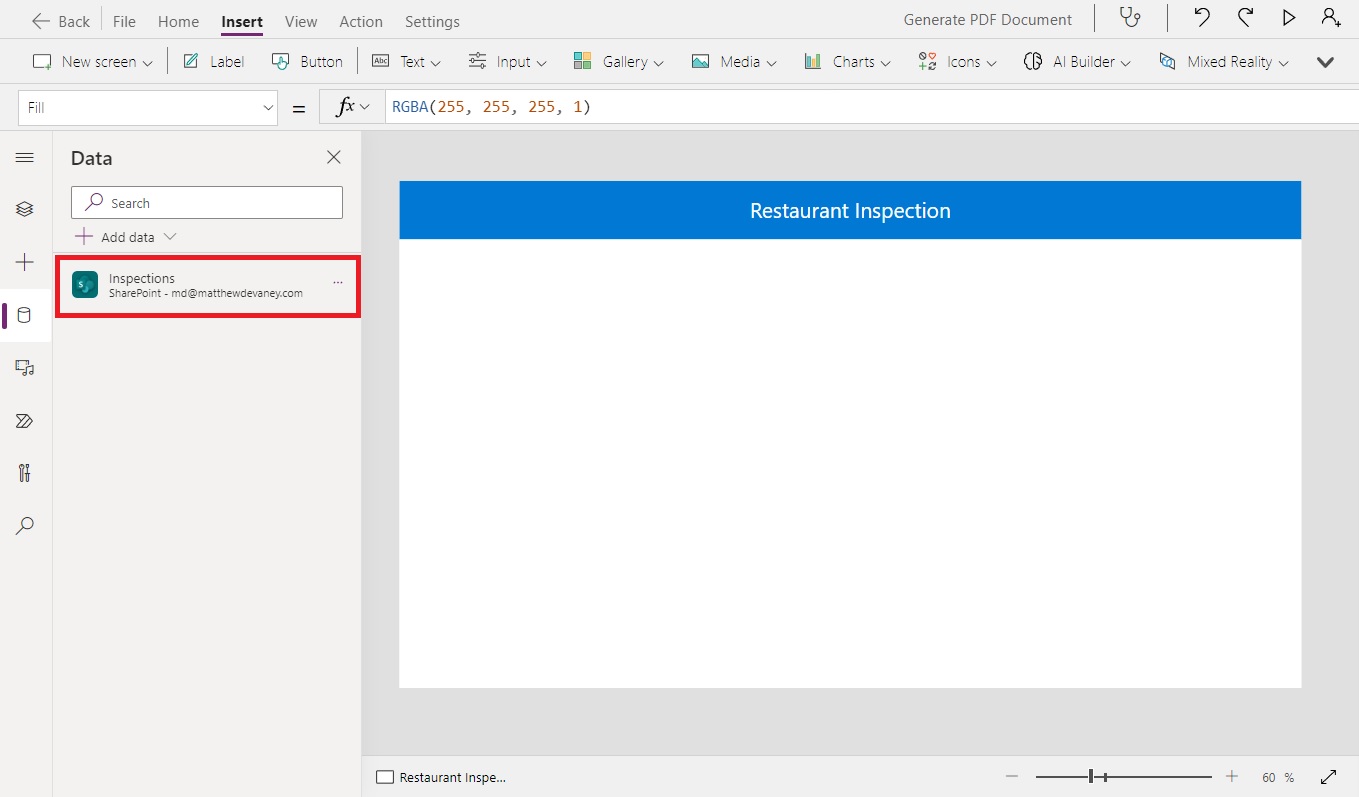
Connect the Inspections SharePoint list to the app.
Then insert an Edit Form to the screen and use the Inspections list as the Datasource.
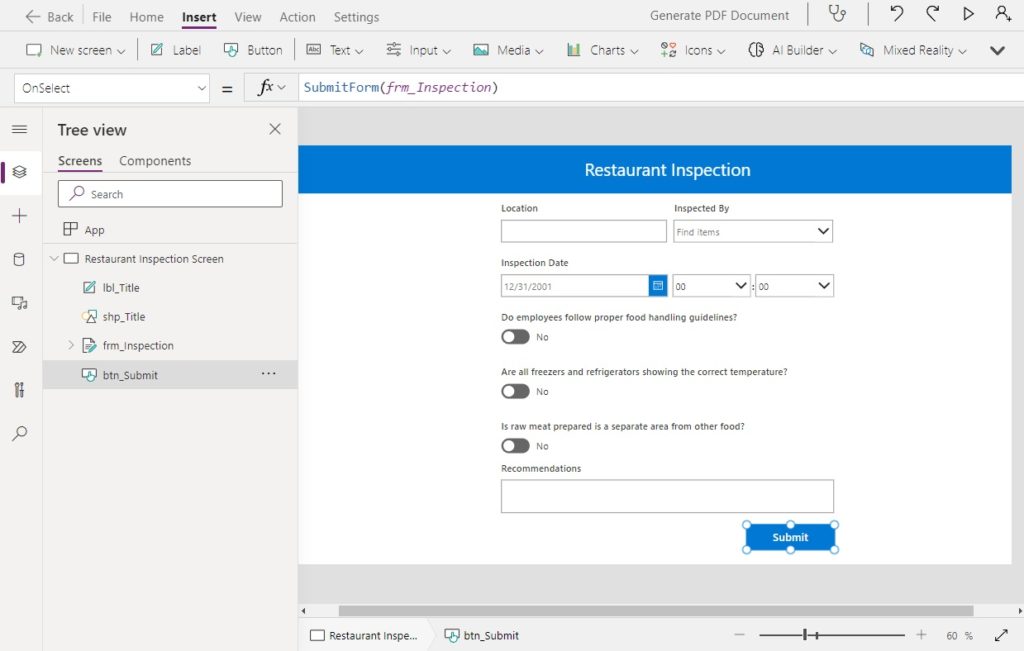
Layout the form controls as shown in the image below.
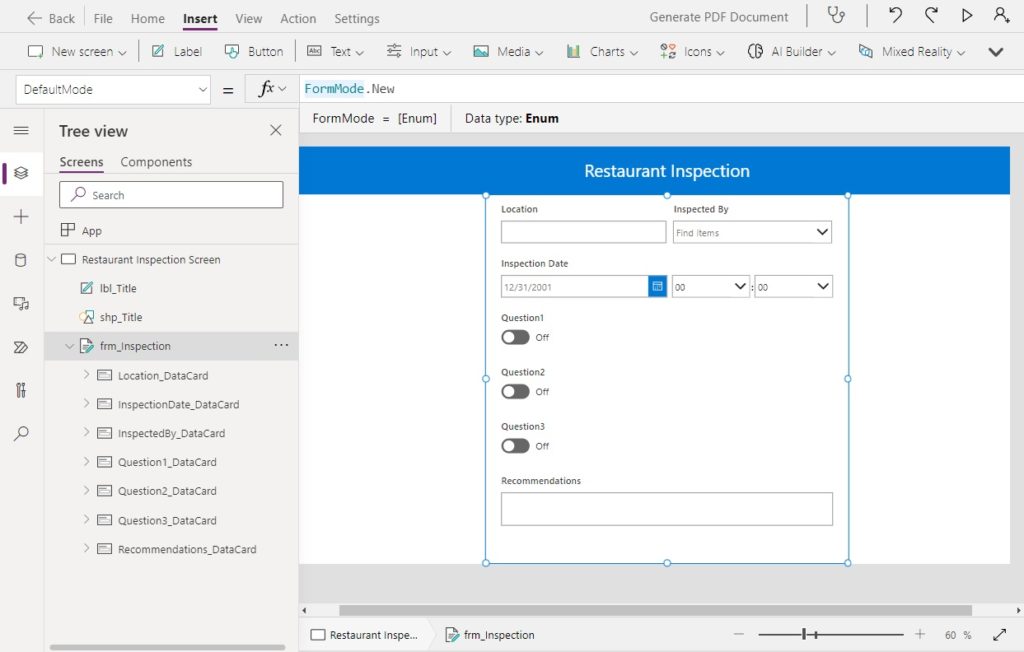
Write this code in the DefaultMode property of the form to create a new record when the form is submitted.
FormMode.NewConfigure The Inspection Form Questions
The Question1, Question2 and Question3 all use a toggle control with a text value of On or Off. We want the toggle to read yes or no instead.
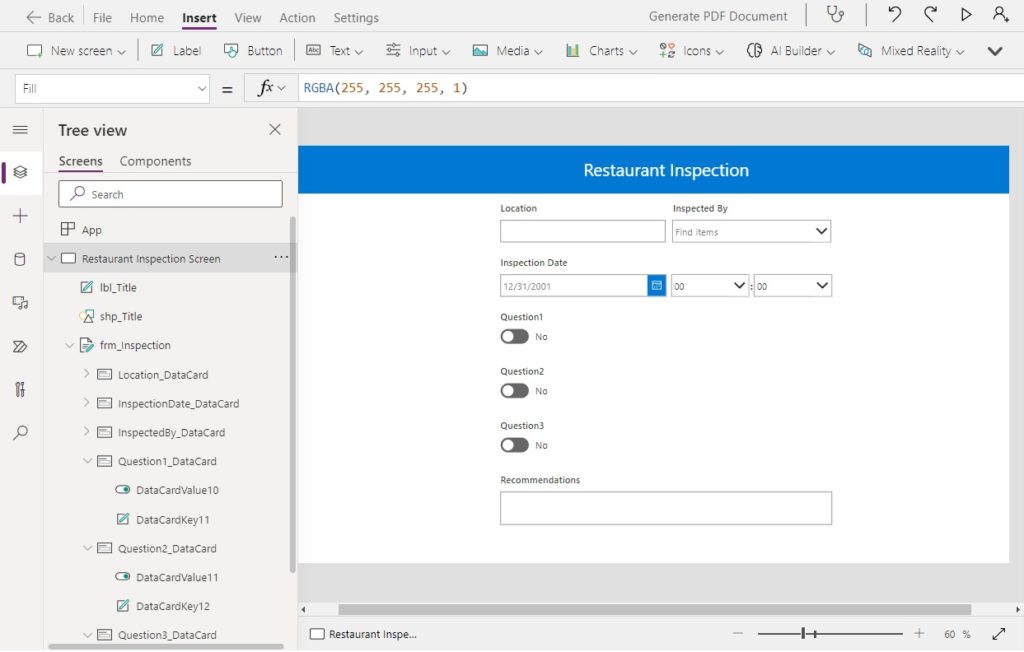
Use this code in the FalseText property of all the toggles.
Then write this code in the TrueText property of the toggles.
Set the toggles to start in the No position by changing the Default property of their card to false.
falseNext, we must replace the titles Question 1, Question 2 and Question 3 with a yes-or-no question.
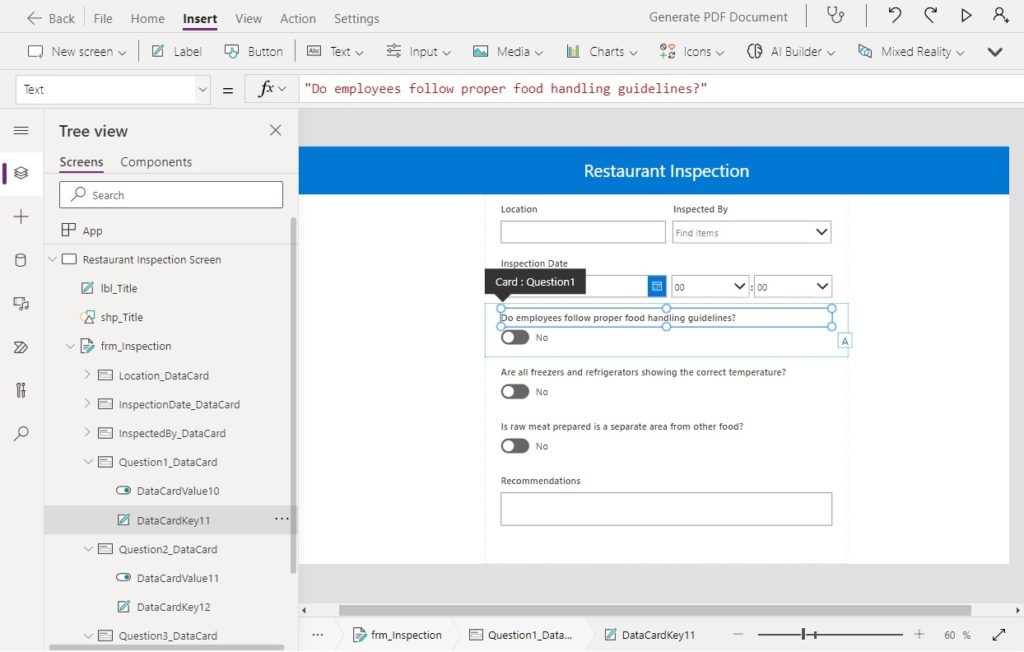
Write this code in the Text property of Title label for Questions 1, 2 and 3.
"Do employees follow proper food handling guidelines?" // Question 1 "Are all freezers and refrigerators showing the correct temperature?" // Question 2 "Is raw meat prepared is a separate area from other food?" // Question 3Submit The Restaurant Inspection Form
When the restaurant inspection form is completed the staff member presses the submit button and the results are posted to the Inspections SharePoint list. Submission of a new inspection form triggers the creation of a PDF form.
Insert a button at the bottom of the form and use this code in the OnSelect property.
SubmitForm(frm_Inspection)Once the Inspection form is submitted we want to show a success notification and clear the form for the next inspection.
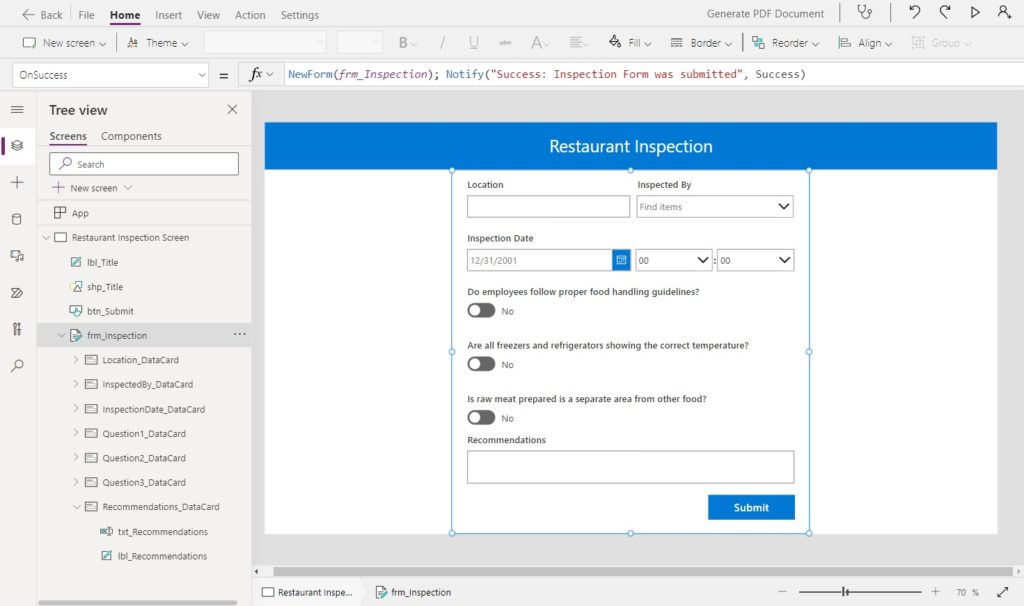
Write this code in the OnSuccess property of the Edit Form.
NewForm(frm_Inspection); Notify("Success: Inspection Form was submitted", NotificationType.Success)Enable The Developer Tab In Microsoft Word
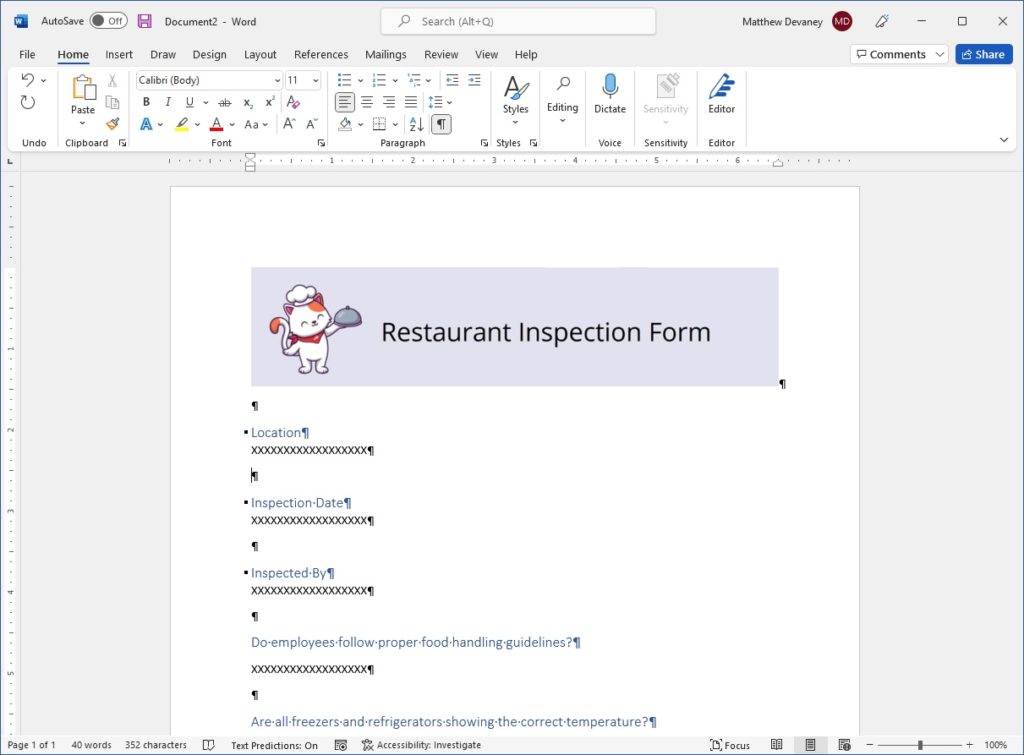
Next we will create a Word document template. The Word document will be filled in with information from the Power Apps form and converted to a PDF by Power Automate. Open Microsoft Word and begin a new document (.docx). Include a title for each form field and then write some placeholder text below each title.
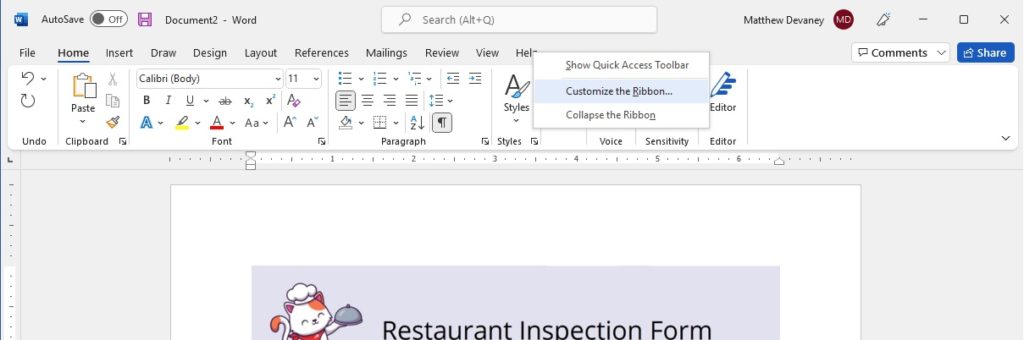
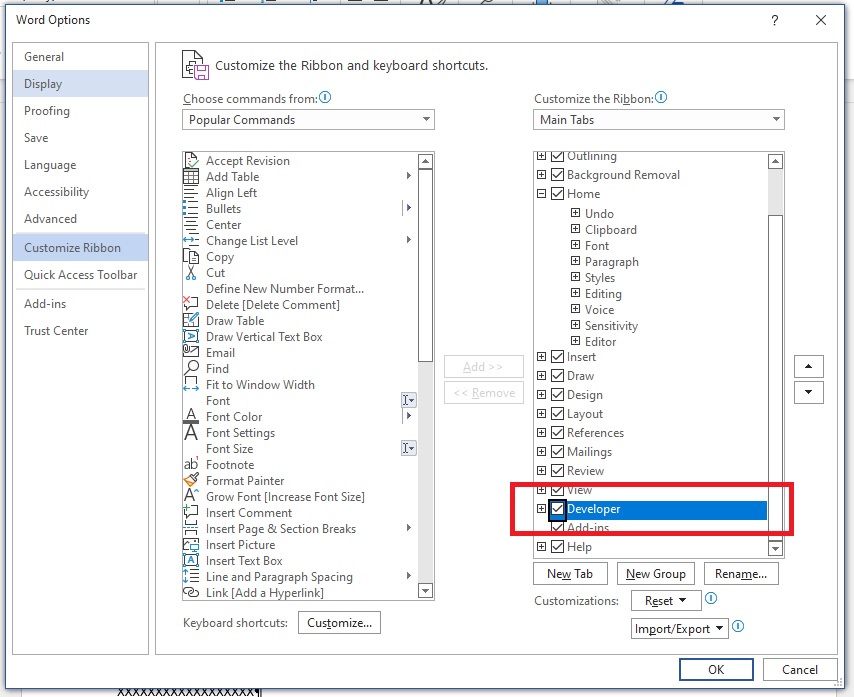
We need to enable the developer tab in Microsoft Word. Right-click on any tab in the ribbon and select Customize the Ribbon.
Check the developer tab on the right-side menu. Then press OK. The developer tab now appears on the ribbon.
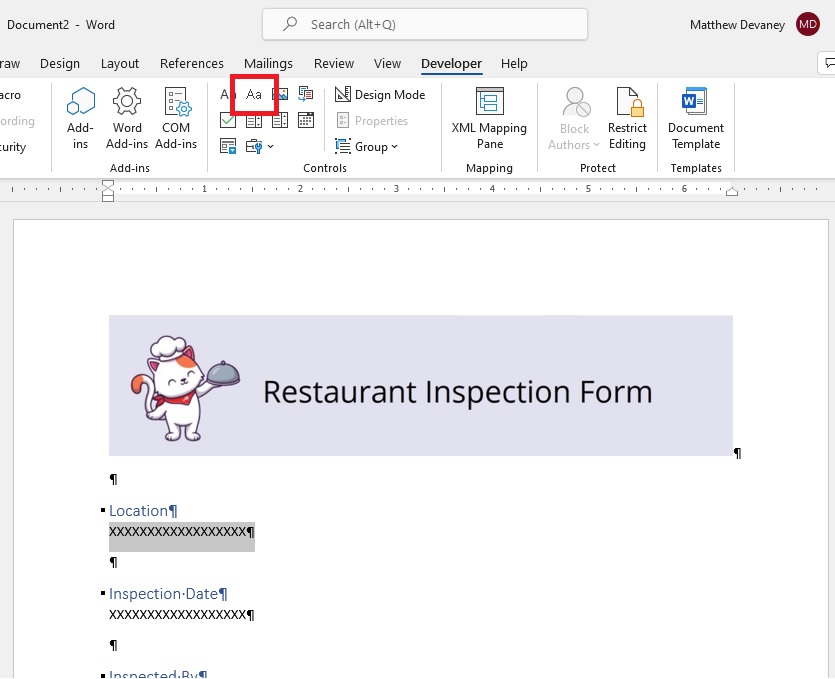
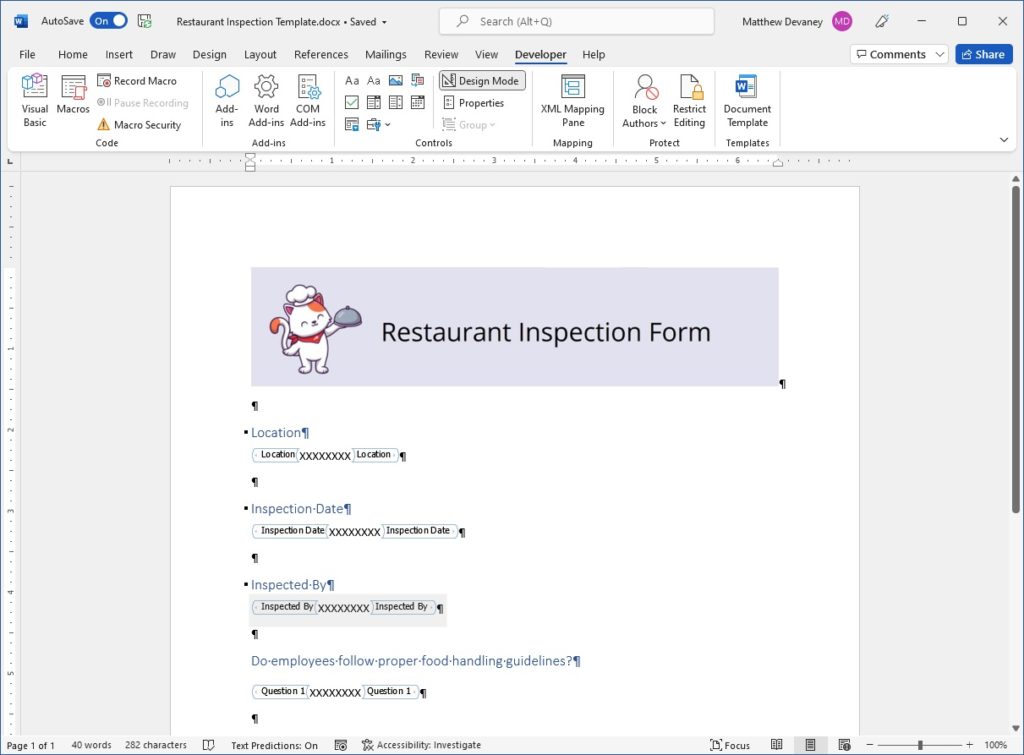
Add Plain Text Fields To The Word Document Template
To fill the form in Power Automate we must implement a fillable plain text control for every form field. Highlight the placeholder value for location and select the plain text control.
Then with the plain text control selected click on Properties.
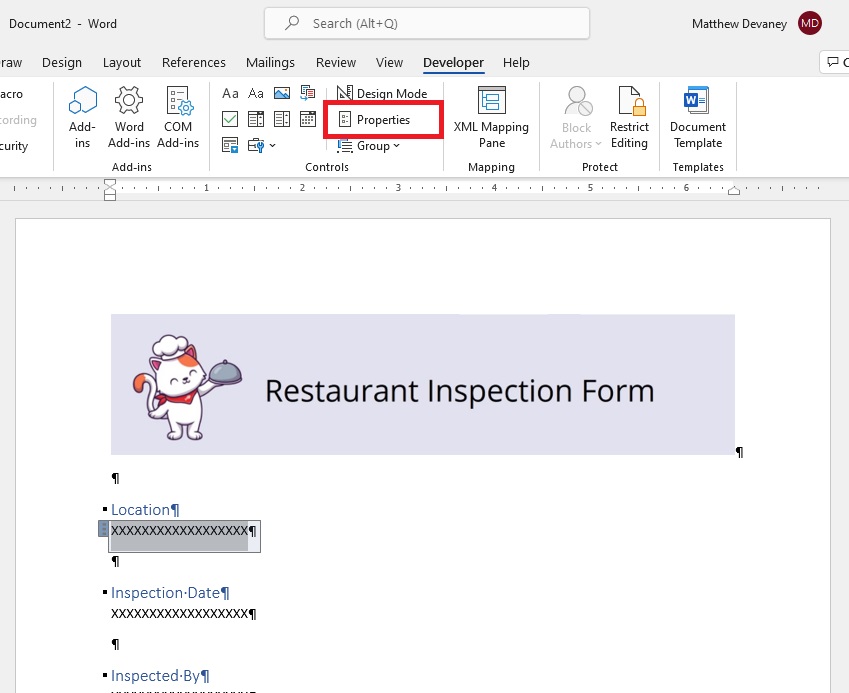
Fill-in the Title and Tag properties with the name of the field “Location.”
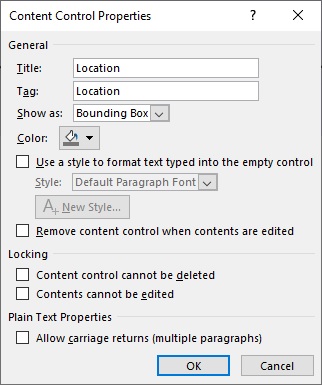
Click on Design mode to see the boundaries of the text input field. The placeholder value should be between the start and end of the plain text control.
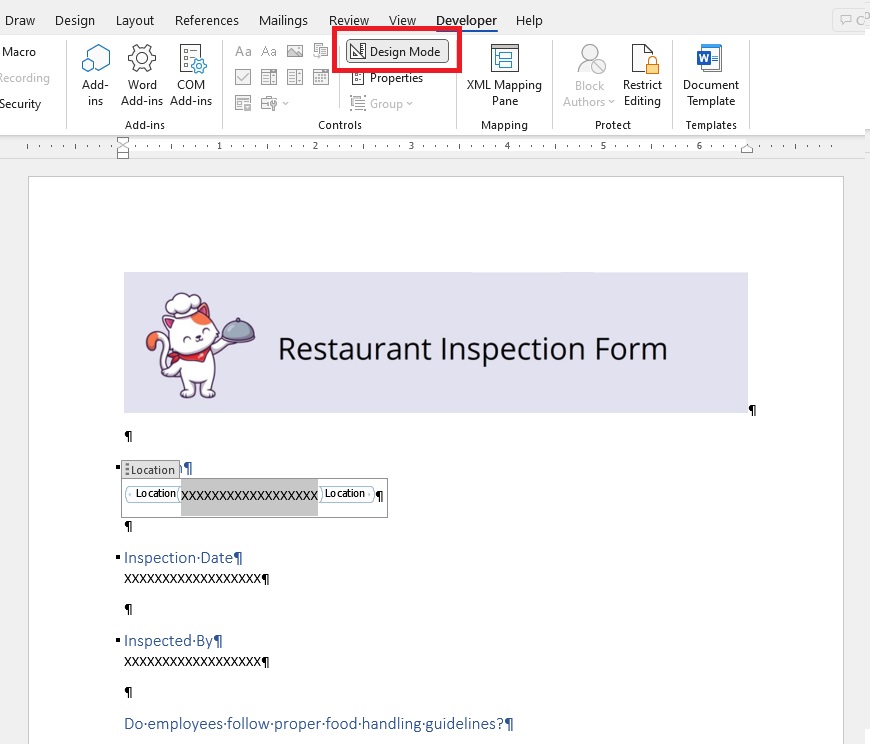
Repeat the previous steps for all other fields in the Word document.
Save The Word Document Template To OneDrive
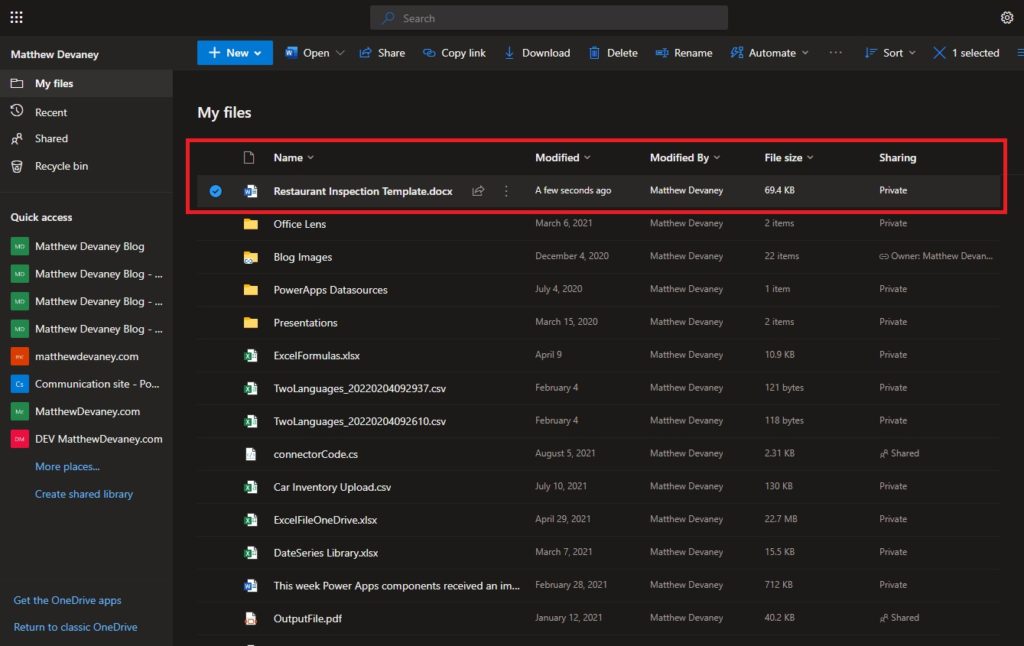
The Word document must be saved to a SharePoint document library or OneDrive to be used by Power Automate. In this tutorial we will save it to OneDrive. Open OneDrive and drag-and-drop the Word document into the root folder.
Fill-in The Word Document Template With Power Automate
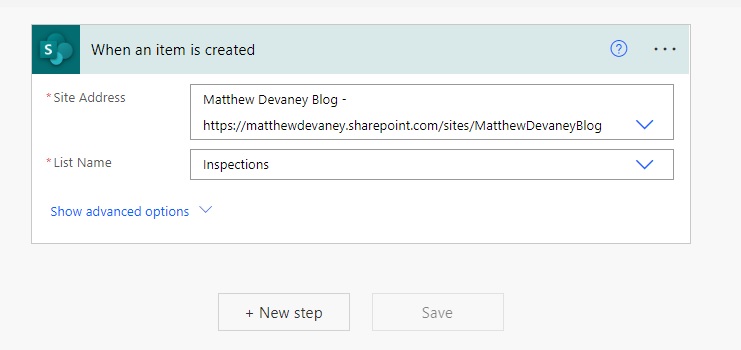
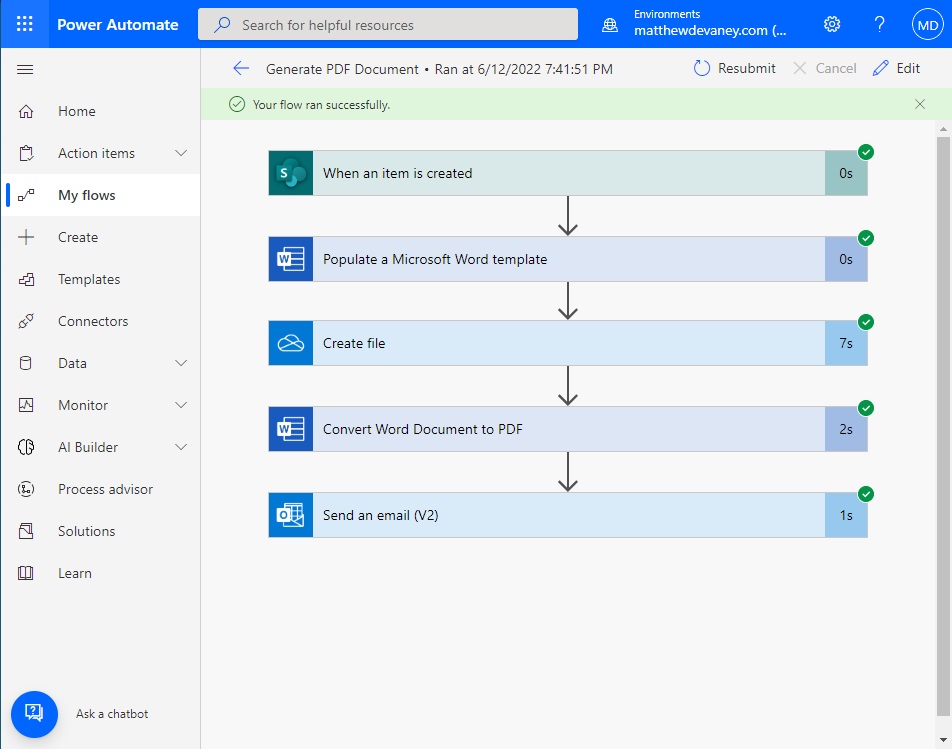
A PDF of the Restaurant Inspection form will be generated once the form is submitted in Power Apps. Open Power Automate and create a new automated cloud flow. Name the flow “Generate PDF document” and use When an item is created as the trigger.

Connect the When an item is created trigger to the Inspections SharePoint list.
Add a Populate a Microsoft Word Template action and point it to the Restaurant Inspection Template word document we stored in OneDrive. Fill-in the Word document with information from the newly created record.
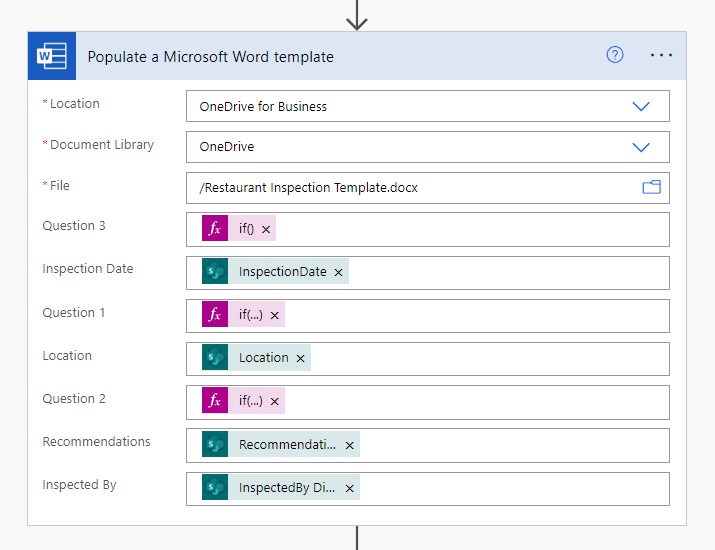
The Question 1, 2 and 3 fields have the data type Yes/No in SharePoint but they will display the values true or false in our Word document by default. We must write a Power Automate expression to change the values to yes or no instead. Write these expressions in the Question 1, 2 and 3 fields respectively.
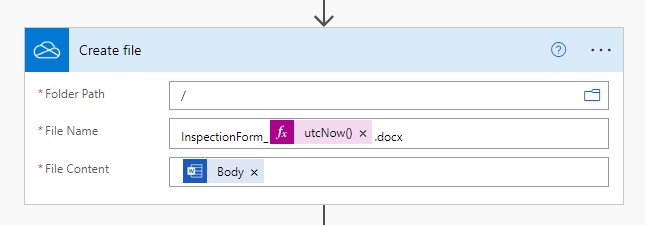
if(triggerOutputs()?['body/Question1'],'Yes','No')if(triggerOutputs()?['body/Question2'],'Yes','No')if(triggerOutputs()?['body/Question3'],'Yes','No')Insert a Create File step to generate the Word document. Use the Body of the previous step as the file content.
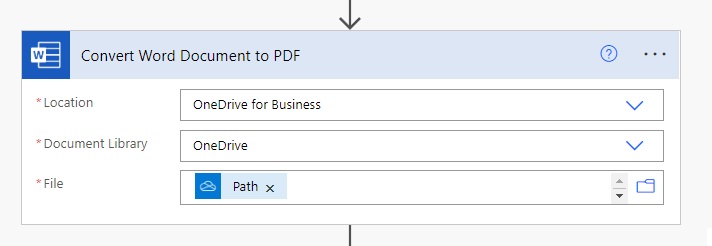
Next, use the Convert Word Document to PDF action and supply the location of the newly created file.
The resulting PDF file can be output to a SharePoint document library, stored in a OneDrive folder or sent in an email. In this tutorial we will send an email. Add the Send an email (V2) action and open the advanced properties. Fill-in the Attachments Name property with the filename “InspectionForm.pdf” and populate the Attachments Content property with the PDF document.

We are now done building the flow in Power Automate. Save the flow and turn it on. We are ready to generate the PDF form in Power Apps.
Generate The PDF Document Using Power Apps & Power Automate
It’s time to test the app, flow and word template we’ve created together. Fill-in the Restaurant Inspection form in Power Apps and click Submit.

Once the form is submitted the Power Automate flow will be triggered. It creates a Word document, converts it to a PDF and then sends an email with the PDF attached.
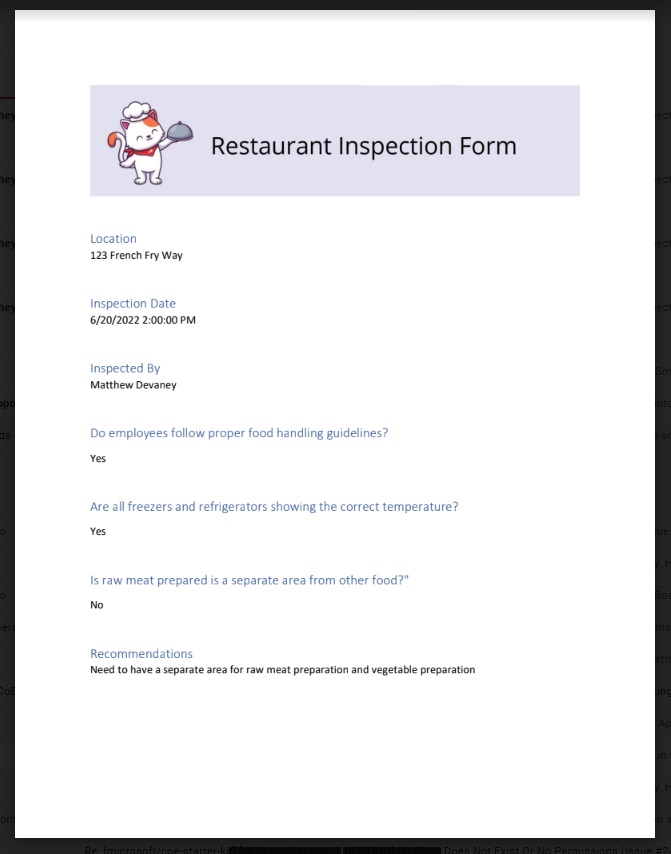
The filled-in PDF attached to the email will look like this.
Subscribe to get new Power Apps articles sent to your inbox each week for FREE
Questions?
If you have any questions about Easiest Way To Generate PDFs In Power Apps (No HTML) please leave a message in the comments section below. You can post using your email address and are not required to create an account to join the discussion.